
How to Set up a Shopify Store in Nigeria – Beginner’s Guide
Here’s a step-by-step guide on how to start an online store with Shopify in Nigeria.
Maybe you have those hot and fast-selling products and you want to take it to the next level. But creating an e-commerce store has always been a challenge.
Well, I guess today is your lucky day!
Why? This is because you longer have to be a techy or that experienced web developer before you create a beautiful and neat e-commerce website.
I’m not just talking about any online store … I mean quality and beautifully designed e-commerce website.
Just like any pro would have built it, and you can do this even if you are hearing Shopify for the very first time.
So, in this tutorial, I’ll teach you how to set up your first e-commerce store on Shopify and sell your product easily, heck this can even be used for a mini importation business.
But before we proceed…
For the sake of those, who have little or no understanding of what Shopify is, this should clarify that.
What is Shopify?
Shopify is a complete solution for beginners and people who don’t like coding or have any prior web building skills.
Simply put, Shopify is an all in one solution that allows you to easily build your store by yourself. This particularly helps against paying for a web developer to create your e-commerce website for you.
To learn more about Shopify, you can check my complete reviews here.
How to set up your online store with Shopify in Nigeria
One of the reasons why Shopify is such a popular e-commerce platform owes to the fact that, anybody…including you can create an online store with Shopify under 20 minutes and ready to start selling.
The best part is, you also get a 14days free trial to text run the platform and if you found the platform not to be ok, you can cancel your account immediately.
Step 1. Sign Up with Shopify
What you need to do now is visit Shopify.com. At the home page, hit the “Get started” button which will later direct you to the sign-up form page.
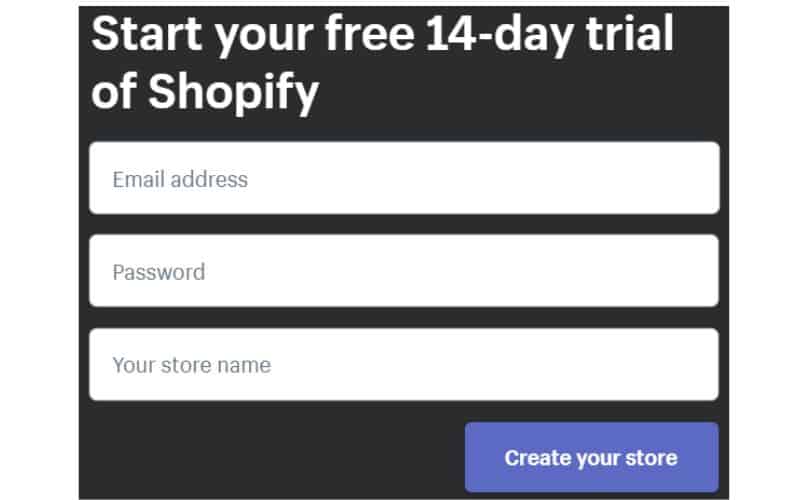
Enter the required details, make sure your store name is unique and avoid going for the popular name because chances are they would have been taken already.
After you’ve entered all the necessary details, click the “Create your store” button.
What I would advise, if this is your first time, use the fourteen days free trial to get familiarize with the platform by tweaking around its interface.
The next page is very important, as this talk about your business. Here you’ll be required to provide more details about your business.
I’m sure it isn’t a form you have filled before.
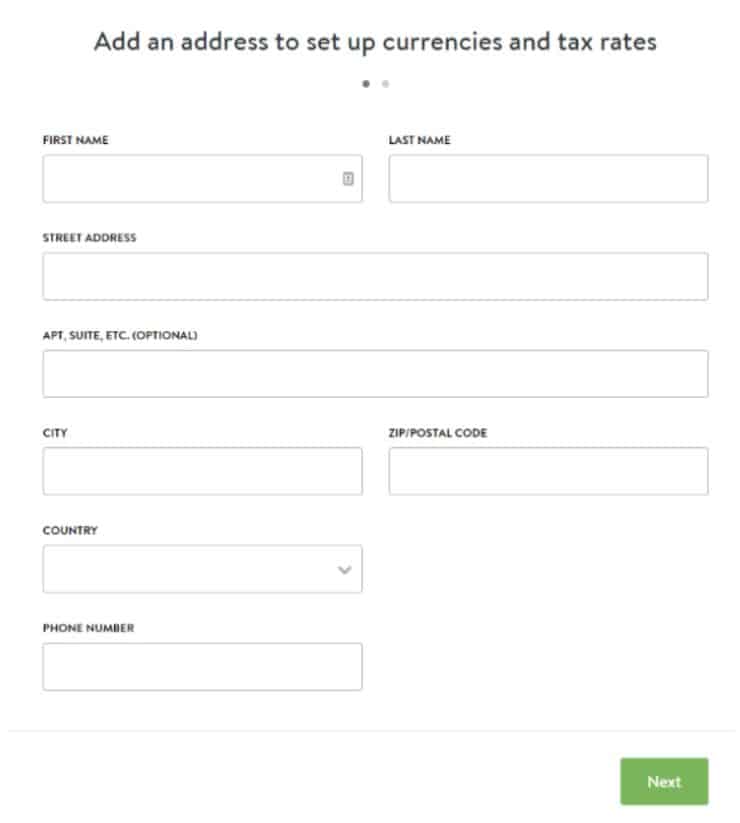
After filling the form correctly click the “Next” button. After this Shopify will ask you few additional questions like… are you ready to start selling or just playing around.
Choose what you intend to do and click on “Enter my store” to continue.
Step 2. Setting Up Your Online Store
After you’ve successful sign-up you will be directed to your Shopify dashboard. This is where you will start customizing your store, uploading products, setting a payment gateway and launch your store to start selling online.

- (1) This is where your first order will show up and where you will be able to manage incoming orders.
- (2) Here, you can easily manage your products, inventory, and collections of products.
- (3) This will show you everything that has to do with your customers. i.e their past order, personal details, stats and much more.
- (4) You can generate all kinds of reports about your store performance here!
- (5) This is where you create discount codes for customers in other to attracts more sales.
- (6) Here, you can easily install apps to supercharge your store, a good example is Spocket for those that want to dropship.
- (7) In this panel, you will see everything that has to with themes, Page, Blog post, Navigation, Domain, and preferences.
- (8) You will find every other related setting to your online store here, which includes; Payment settings, checkout, shipping, taxes and many others.
- (9) This is the main screen for all the panel we’ve highlighted.
Step 3. Choose a “Theme” for your online store
Just like WordPress themes, Shopify also has its own official theme store.
One thing you can be sure of when it comes to Shopify themes is a full support from the designer of the theme.
To me, most of Shopify themes are pretty much the same thing, but when it comes to beauty, Shopify is a top notch.
So if you thinking of editing them, I’m pretty sure you’ll find little or nothing to change because they’re perfect on their own.
But, if you like customization so much, the premium themes are more open to customization compare to the free ones.
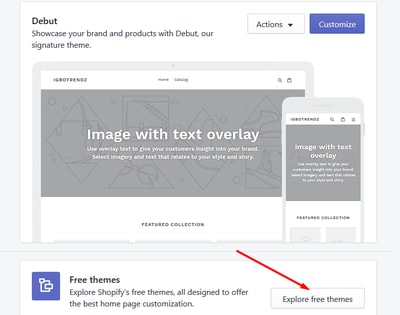
To change your theme, login to your dashboard and visit the “theme store”. You should be able to do this by clicking your online store.
Explore the themes and choose the one that suits your needs.
Just to re-assure yourself while choosing the theme, you can actually preview it before choosing it.
To do this, click the View Demo. With this, you will able to see what the theme will look like before installing it.
Once you’ve seen a theme you like, click the “add” bottom to install your theme.
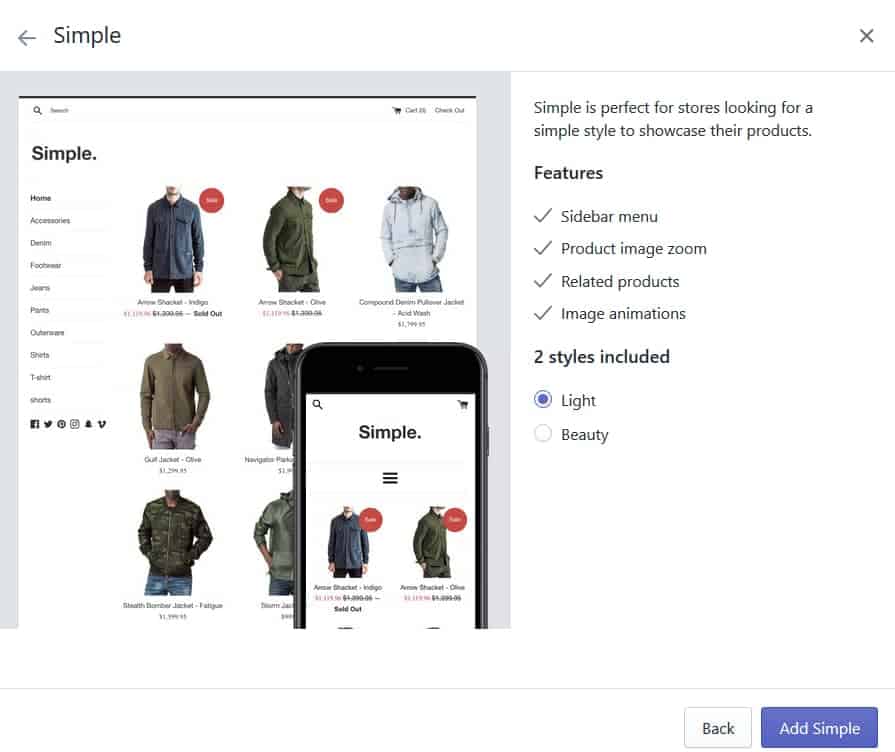
After the theme has been installed, Shopify will notify you upon successful installation.
Step 4. Adding your products
This is when your online store starts making sense. To add your first product, navigate to the left sidebar of your admin dashboard and click on “Product“.
The next thing you will see is the blue “Add a Product” button in the top right corner of the page.
Once you’ve clicked that you should see something similar to the image below.
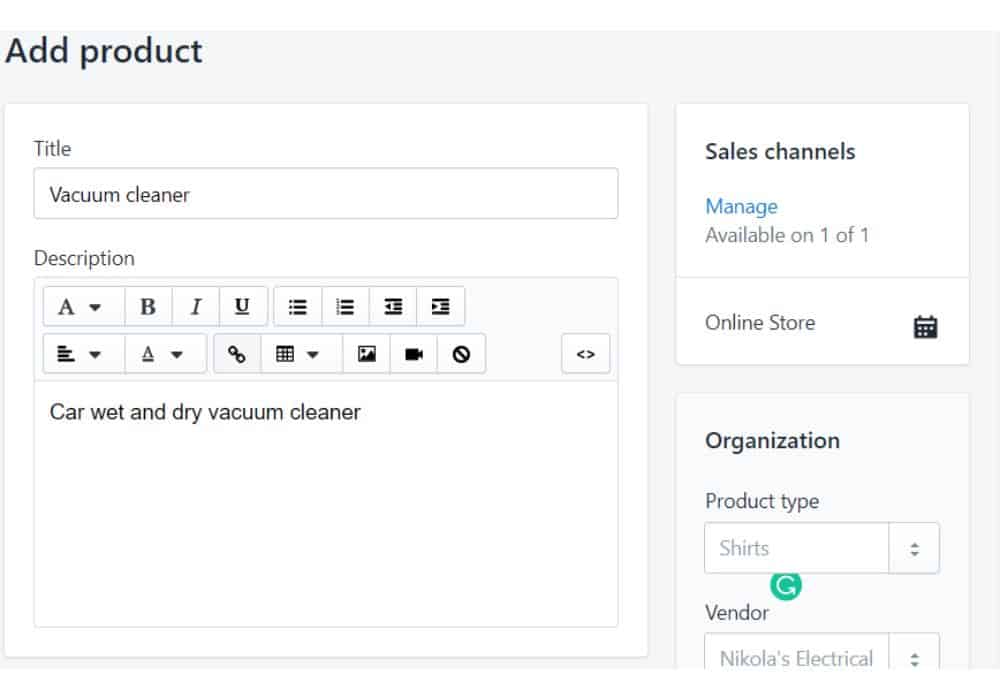
Enter your product name and write a short description of it as well.
Product image makes 80% of your sales, so make sure the picture you are uploading is clean, clear and very attractive.
To make your store look tidy, I’ll suggest you keep your store images in the same dimension.
After you’ve uploaded the product image, the next box below is the product price and inventory.
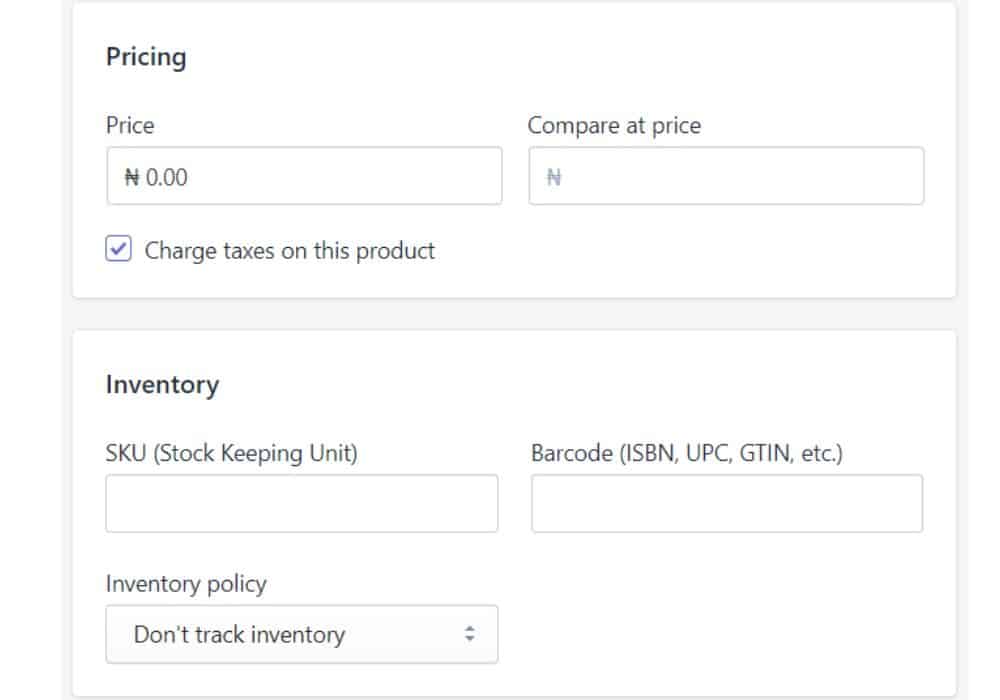
At this point, you can set the products price, check the box if you want the tax to be pass on the product or simply uncheck it if you don’t want.
You could also set your product inventory, i.e the number of products you have left and finally your shipping variant.
once you’re done with everything click the save button at the upper or lower right corner to save your product.
Also important is the About page or Homepage
These pages are very important for any business online, as it lets people know what your business is all about.
To create pages for your store which could be… About page, Homepage and the likes, click the online store >> Pages( from the left sidebar).
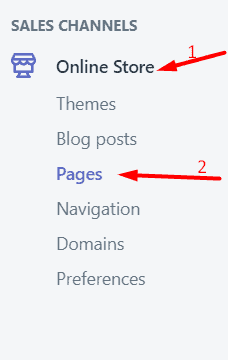
Once you are there, choose the title of the page, it could be “contact us“, or homepage and write the content.
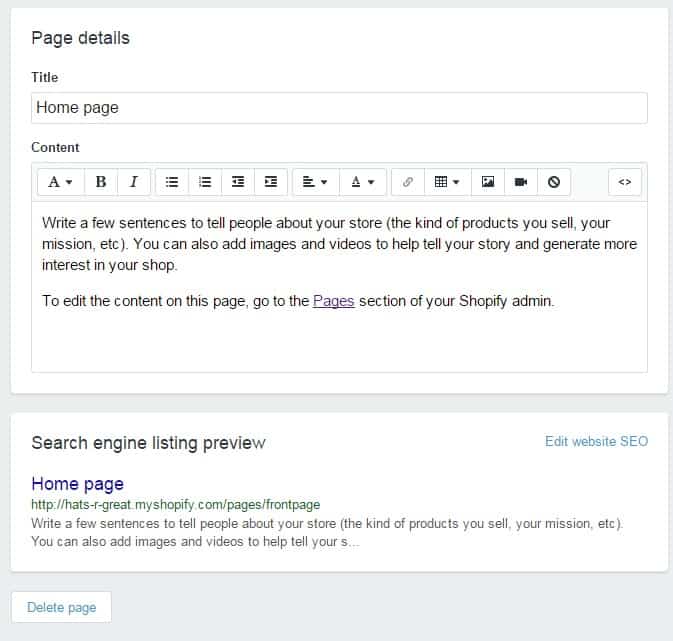
After you are done writing the page content save the page to make it public.
Step 5. Integrating your Payment Gateway
The payment gateway is the most important aspect of setting up your Shopify store. Having a beautiful online store with no payment gateway equals nothing.
A payment gateway allows you to take payment from your customer via your website.
While choosing your payment gateway you should have it at the back of your mind that not all payment gateways are created equally.
Some come with high commission rate while some are equally average.
However, while choosing your payment gateway for any business, put the following into consideration:
- Transaction Fees: Some payment gateways will charge you based on a small percentage will others will charge you on a flat rate. Try and compare to choose the best one for your business.
- Card Types: You also need to compare the kind of cards your payment allows. But I think all accepts VISA and MasterCard.
Fortunately and unfortunately, the only payment gateway that works perfectly fine in Nigeria with Shopify is Paystack and CashEnvoy.
If you want to target the international market you’ll need a Verified PayPal account that sends and receive money in Nigeria.
To integrate your payment gateway, go to setting at the rear end in the admin dashboard and click on payment providers.

After clicking on the payment provider, you will see the option to either choose PayPal or Credit Card.
I assume most people will be going for credit card. So click on credit card and from the drop-down menu, you will see payment gateways available in Nigeria Paystack and Cashenvoy.
I use Paystack, so I choose it.
You could choose any of the two they work perfectly fine.
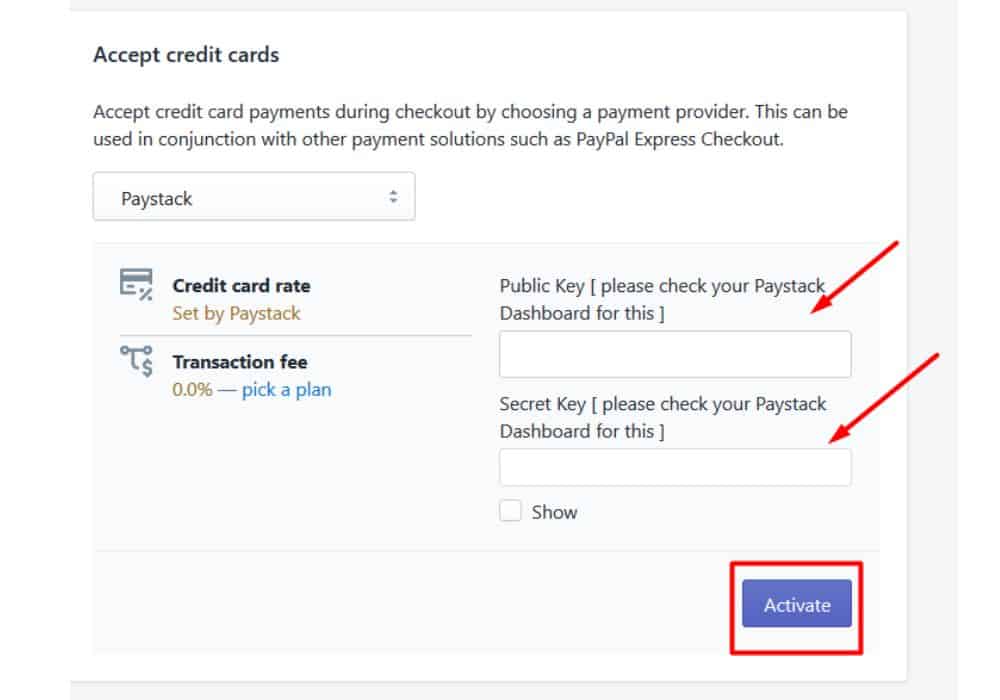
What you need to do next is to activate your payment gateway.
To do this head over to your Paystack account and go to setting to get all the required keys.
Once you’ve done that successfully, click the “Activate” button
Note: To use Paystack as a payment gateway you will need a business or corporate account. What you need to do register one if you don’t have already.
Step 6. Add a domain name & Launch your store
Adding a domain is optional, but if you have a custom domain name, your store will look professional.
With this people might not know its built with Shopify.
The normal domain name that comes with Shopify Usually looks like this… www.yourstorename.myshopify.com.
But, using your custom domain name will look like this… www.yourstorename.com.
You can also get your domain name with Shopify but it’s always costlier compare to NameCheap. Domain name with Shopify is always between $15 upward.
While you can get as low as $10 or less with NameCheap. You can learn more about Shopify domains and price here.
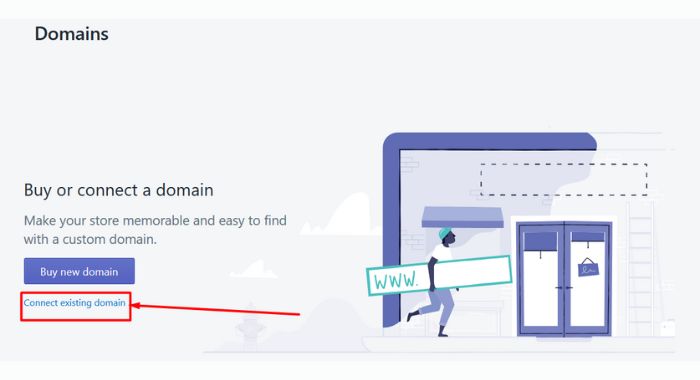
To buy a new domain name head over to “online store” at the left sidebar of the dashboard and simply click on domains.
To transfer or buy a custom domain from a third-party registrar like NameCheap click on connect existing domain.
Once you’ve done that, go back to Namecheap to connect it with Shopify. To know more about that follow this guide.
The next thing is to launch your store. You need to choose a plan and input your card details. But you won’t be charged until after the 14days trial.
learn more about Shopify plan here.
And that’s it! Your first online store without coding or web developing experience.
Shopify will take care of all your products sales and every other thing that has to do with your online store.
You don’t have to be a tech guru before you have an online store, thanks to Shopify!
So what do you think? Ready to give Shopify a trial, Start with this 14 days trial.
Alternatively, thinking you will prefer WordPress and WooCommerce to create your Online store?
Then check my detailed article on how to start an online store with WordPress + WooCommerce.
What are your thoughts on this? Need more clearance on something? Please use the comment box!
![How to Make Money With Shopify in Nigeria [2023]](https://smartbizfreedom.com/wp-content/uploads/2022/08/Image-32.jpg)
![How To Use Shopify In Albania [The Complete Guide]](https://smartbizfreedom.com/wp-content/uploads/2023/09/Shopify-Albania.jpg)
![How To Use Shopify In South Africa [Pros and Con]](https://smartbizfreedom.com/wp-content/uploads/2022/07/Image-6.jpg)
![Shopify Payment Gateway for Nigeria [2023]](https://smartbizfreedom.com/wp-content/uploads/2022/08/Image-38.jpg)
![How To Use Shopify In The Philippines [The Complete Guide]](https://smartbizfreedom.com/wp-content/uploads/2023/09/Philippines.jpg)
![Shopify Review: How To Use Shopify In Colombia [Pros & Cons]](https://smartbizfreedom.com/wp-content/uploads/2023/09/Colombia.jpg)