
How To Use Jasper to Write a Blog Post [In 10 Simple Steps]
In today’s post, I’ll be showing you how to use Jasper to write a blog post from scratch to finish.
Since the launch of Jasper (formerly known as Jarvis), there have been lots of case studies and experiments going on around the software.
Every content marketer and business owner wants to know how AI copywriting tools like Jasper can help in their business.
One of the many questions being asked is how to use Jasper to write a blog post.
Having written over 200,000 words of content with Jasper (yeah, Jarvis), here is a detailed guide that goes over my process for creating quality blog posts with Jasper.
But first, let’s talk about how Jasper works.
How Does Jasper Work?
Jasper is built on the GPT3 framework, an acronym for Generative Pre-Trained Transformer. It is a technology developed to understand and produce human-like text.
Together with the GPT-3 model, Jasper also has technology that helps increase the quality of its offerings.
According to the team, Jasper has read about 10% of the content on the internet to understand how humans write (content dated up to 2019) and that has made it possible for it to perform well.
So, here is how Jasper works:
- Choose a template that fits the kind of content you want to create.
- Enter the necessary details required by filling in the boxes
- Then Jarvis comes up with suggestions and you choose which one fits you.
At least, that is what the human eye sees.
But behind these simple processes, Jasper runs through several codes and does several analyses to find the best match for your request.
Jasper (formerly Jarvis) chooses words by running analyses to find the fittest for the phrase or sentence.
Also, the more you write with Jasper, the better Jasper identifies patterns and follows them in subsequent texts.
Jasper Boss Mode Plan
To write long-form articles with Jasper, you need to be on the boss mode plan, hence the reason why I decided to talk about this.
If you’re currently not on the Boss Mode plan, then the first thing you should do is upgrade your plan.
And if you are yet to purchase a plan on Jasper, then I recommend you get the Boss mode plan to get access to the long-form writing assistant and the full functionalities of the software.
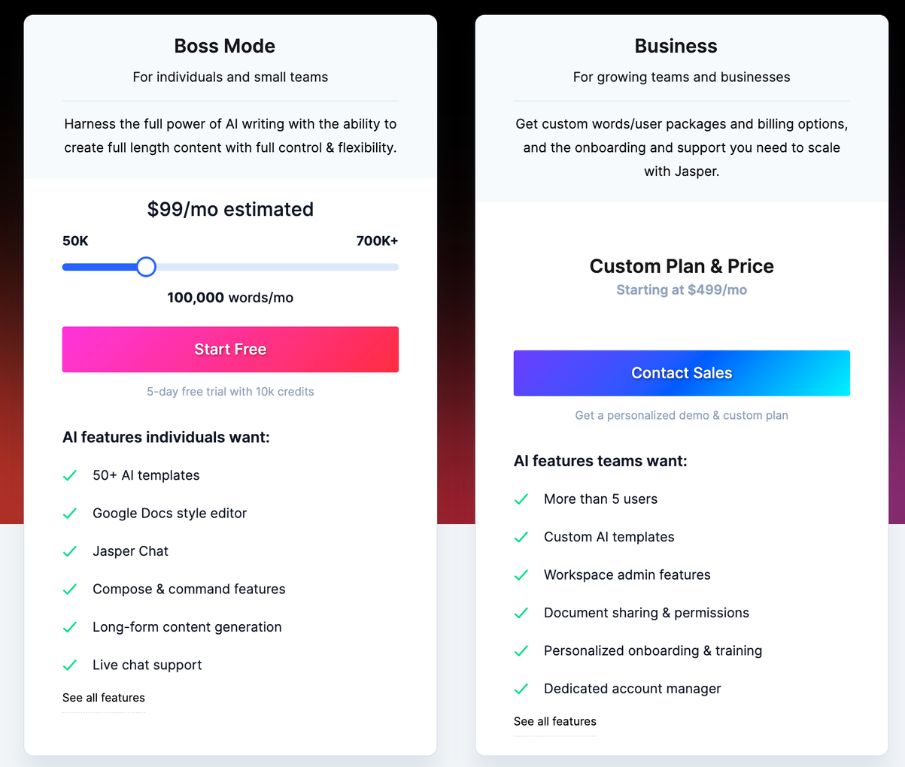
Jasper Boss Mode plan is the most popular plan on Jarvis (Jasper) and that is because of the features it offers.
Boss Mode plan offers you the following features:
- Long-form assistant
- Unlimited account user logins
- Jasper commands
- SEO mode
- Recipes
- Plagiarism checker
- Grammarly
- Priority support, etc.
Its price starts from $59/month and increases based on the number of words you produce per month.
So on this note, let’s dive into my process for creating blog posts with Jarvis.
STEP 1: Choose Your Document Type
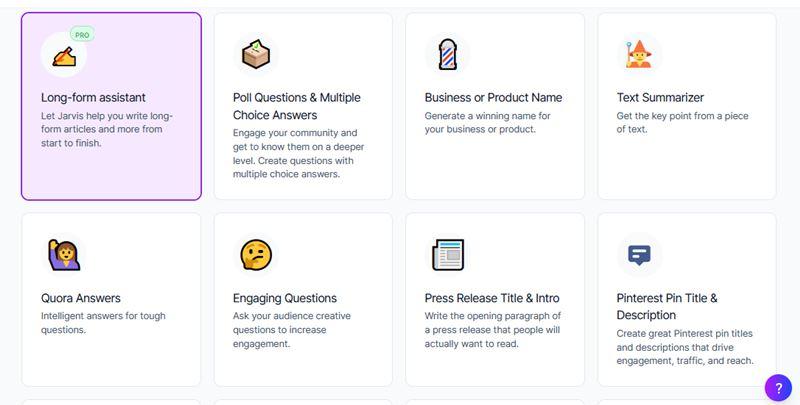
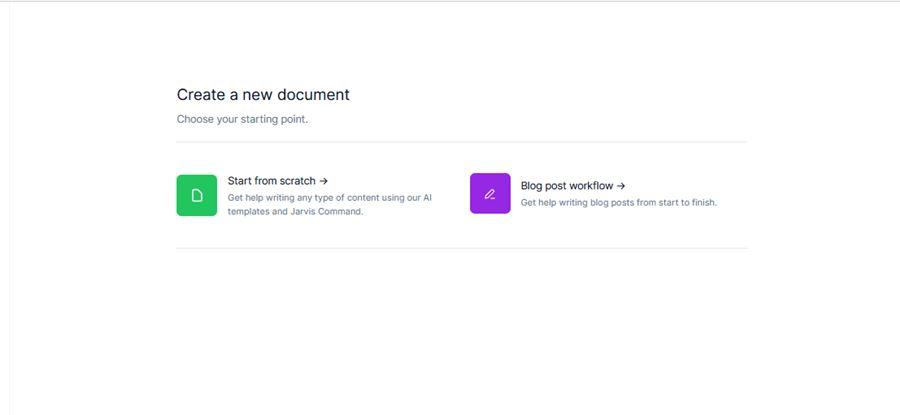
Once you launch the long-form assistant template on Jasper, you’ll be asked to decide how you would like to use it.
You can either start from scratch or use the blog post workflow.
When you start from scratch, you are presented with blank docs to write in. However, this is different from the blank docs experience when facing writer’s block.
Jasper blank docs are armed with several writing tools on the sides of the page ready to fill in the docs at your command.
The Blog Post Workflow provides you with a list of forms to fill and helps you create the workflow which includes the introduction for the blog post, the title suggestions, and keywords.
When you go through the Blog Post Workflow, you’ll arrive at a doc with a pre-filled introduction which you can continue from.
If you’re new to Jasper, the best option is the Blog Post Workflow to simplify the process.
STEP 2: Describe The Content You Want To Create
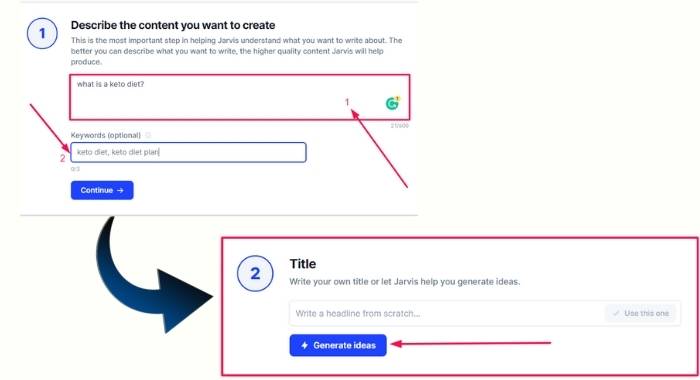
If you go with the Blog Post Workflow, you’ll be presented with a form to describe the content you want to create.
According to Jasper, this is the most important part of creating a blog post with Jasper. The better you can describe the content you want to create, the higher the quality of content that Jasper will generate.
There is no special language needed here. You just need to describe your content in a simple way everyone can understand.
Your description/instruction can be as simple as this:
- I want to write about ways to lose weight very fast
And it can be more specific and detailed like this:
- I want to write about healthy ways to lose weight which will include exercises, foods to reduce, etc.
Below the form for writing your description is another box to fill in your keywords. The keywords will help Jasper understand the topic and also look up similar articles on the internet.
STEP 3: Generate a Title
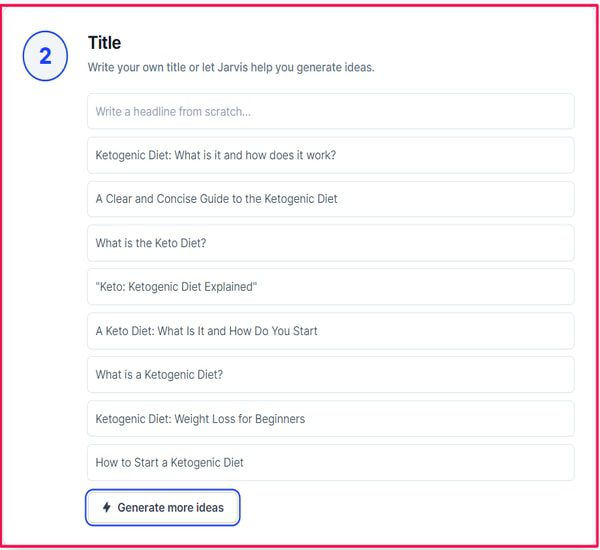
The next step is to generate a title for your piece. You can either write it yourself or let Jasper do the work!
Since your goal is to use Jasper to write your blog post, then you might as well let Jasper create the blog post title too!
To do this, just click the “Generate ideas” button and Jasper will come up with some suggestions and you get to make your choice.
STEP 4: Generate An Introduction
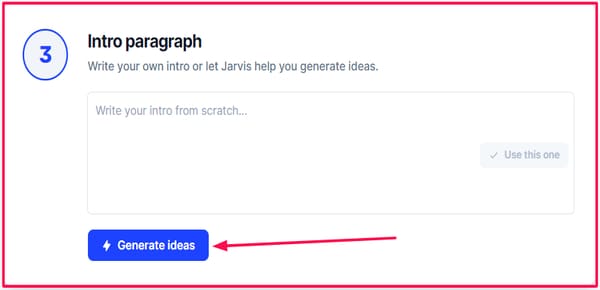
At this point, you have described your content, added keywords, and have also selected your preferred blog post title. It is time to generate your introduction.
Similarly, you can as well craft your introduction or let Jasper do the job.
For me, I prefer to see what Jasper can come up with, then I tweak it to my satisfaction.
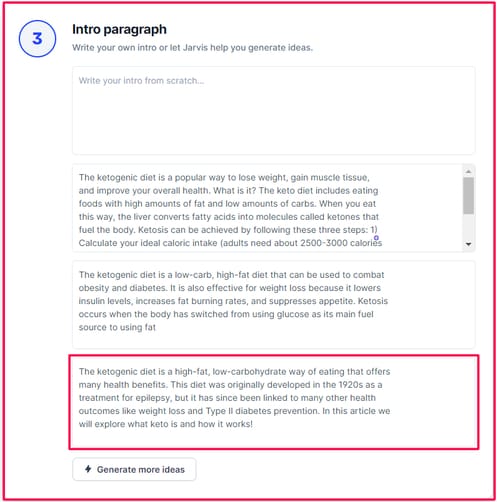
Once again, the “Generate ideas” button will instruct Jasper to come up with suggestions.
Each of the suggestions is editable, so you can tweak it before using it (if need be).
STEP 5: Generate a Blog Post Outline
Finally, once you’re done with forms, you can open up the editor. One thing to love about Jasper is the fact that the editor looks like that of Google Docs, it is simple, armed with tools, and has less clutter.
Once you open up your editor, it is all up to you the directions you want to take to turn your half-empty docs into a full blog post.
But the next advisable step is to create a blog post outline which will serve as a guide when creating your content with Jasper.
This is also the right process to follow even if you are writing the blog posts all by yourself as it helps you save time, reduce fluffs, and get straight to the point.
Interestingly, Jasper can also help you with your blog post outline. As part of the 50+ templates, you also get a blog post outline template.
However, since we are in the editor already, there is a shortcut to command Jasper to generate an outline for you without using the template.
You can instruct Jasper to create an outline for you using a simple command like this:
> Write a blog post outline for the title “ How to lose weight”
To run the command, use cmd + enter on Mac or ctrl + enter on Windows and you will see the magic.
In cases where you are not satisfied with the outline, you can edit it or have Jasper rewrite another outline.
If you want a rewrite from Jasper, use these commands:
- For macOS – CMD + /
- For Windows – CTRL + /
But I do advise you to write the outline yourself if you already have an idea of what you want to cover in the article.
Even if Jasper generates the outline for you, I still recommend cross-checking it with what your competitors covered and the content opportunities on the SERP.
Do note that the Jasper Command we used above to instruct Jasper to create an outline only works on the Jasper boss mode plan.
If you are not on this plan, that is, you are on the starter plan, then you’ll have to use the Blog Post Outline template to generate your outline.
All you need to use in the Blog post outline template is the title of your blog post and the tone you want to use in your content.
Here is a quick breakdown of how to make use of the Blog Post Outline template:
- Click on the “Blog Post Outline” template
- Enter your blog post title
- Enter the tone of voice
- Generate AI content
It is worth mentioning that you can tweak the number of outputs (results) you want Jasper to generate.
STEP 6: Format Your Headings
With your outline ready, the next thing to do is to format your headings as H2 and H3 as you see fit.
Formatting the headings will help Jasper improve the context and quality of texts generated under each subheading.
You can find the formatting options by highlighting the text you want to format. The formatting options available include headers, rephrases, adding bullets and fixing grammar, etc.
STEP 7: Write The Blog Post with Jasper (Jarvis)
This is the most important section of using Jasper to create content for your site.
Unlike what many people think, Jasper can’t generate over 1k words for you at a go. It is a step-by-step process just like you are laying blocks till you have your complete article.
Although you can have Jasper generate up to 450 words by clicking the compose button multiple times, it is not the best way to make use of the AI software.
When you do such, you’ll have lots of fluffs and low-quality content to battle with which is what we are trying to avoid.
To write a quality blog post with Jasper, there are some tools and commands provided by the Jasper team to simplify the process.
Here are some of them:
Variable Output Length
Jasper allows you to select your preferred output length. The shorter the output, the better the quality.
There are three output length options:
- Shorter: 20-25 words
- Medium: 50-55 words
- Longer: 110-115 words
Content Brief
The content brief is where you describe what you want Jasper to cover in each section of the article.
You’ll find the box for the content brief on the left-hand side of the dashboard. To get quality output, you’ll have to keep changing the content brief as you proceed into the sections in your article.
Changing the brief helps Jasper write in the context under each of the sections. It also reduces the chances of Jasper repeating the same sentence in your article.
Using the previous example of writing about weight loss.
If your topic is – “11 Ways to Lose Weight”, one of the ways to lose weight is through exercise.
Your previous brief/description will be about weight loss in general which will help Jasper write the introduction.
But as soon as you get to the next section “exercises”, you need to change your brief to something that describes exercises as a way of losing weight.
Compose Button
I know you are aware this is the button to press for Jasper to generate more texts but this button also has some super functions.
One of the functions is the ability to continue from where you stop. For instance, you can write a few texts and click the “compose” button and Jasper will continue from there flawlessly.
This is helpful when you run out of the right words to use or how to continue the sentence. It also helps you give Jasper a hand in thinking in your direction.
Using *** Shortcode
As you begin to use Jasper to generate long-form content, one shortcoming of the software you’ll notice is that it repeats itself in many cases.
Yes, this is something that still occurs when I use copywriting software. The solution to this is the three asterisks shortcode.
To prevent Jasper from repeating itself in your long-form content, you need to control the area it sees.
The way to do so is to add three asterisks in the editor and any text above the asterisks will not be visible to Jasper.
In other words, Jasper won’t be able to copy itself or use the above texts again in the article.
Also, if you don’t want Jasper to use the content brief and the rest of the information in the sidebar, there is a toggle button to turn it off which makes it invisible to Jasper. This is just another superpower you can utilize to generate quality content.
So, How do we go from Outline to 2000 Words Plus?
Let me start by saying Jasper is a writing assistant and that means you still have some work to do except you are okay with mediocre content. But I assure you, it is less work compared to writing without Jasper.
The million-dollar question here is, how do you go from outline to over 2000 words?
Well, here is how I go about this.
First, I believe you already have your introduction written (if you use the Blog Post workflow).
So if that is the case, all we need to do is to start from your first subheading.
Let’s assume your first subheading is “Eat Regularly”, the next thing you want to do is to make that subheading a title on the left-hand side of the dashboard.
Then rewrite the brief/description to suit the subheading and change the keyword slightly.
Once this is done, you can click the “Compose” button and let Jasper come up with the texts.
Review the text, start a sentence and click the “Compose” button for Jasper to continue from where you stopped.
Correct the grammatical errors, rephrase some sections, add more lines, till you are satisfied with the texts in that section.
Move to the next section, change the title and content brief, and click the compose button.
Rinse and repeat this for the rest of the subheadings.
If you have 10 subheadings and you can generate 300 words under each section, you’ll arrive at 3000 words.
Why not try it out for yourself?
STEP 8: Generate a Conclusion
Now I believe you have your content written except the conclusion. Once again, you can craft your conclusion yourself or have Jasper create one for you.
If you are on the Jasper boss mode plan, then you can use Commands to instruct Jasper to write a conclusion.
Your command can be as simple as this:
>Write a conclusion on the above content
You can as well start the first sentence of your conclusion and let Jasper complete it.
Something like this:
- In conclusion, (click the compose button for Jasper to continue)
Jasper will continue from there and complete it. You can also use a synonym for “conclusion” but I love to mention the conclusion so that Jasper understands the instruction.
STEP 9: Make it SEO-friendly
Now we have our article ready and it is time to optimize it for SEO. If you have a Surfer SEO account, then you can integrate it with Jasper to optimize your content.
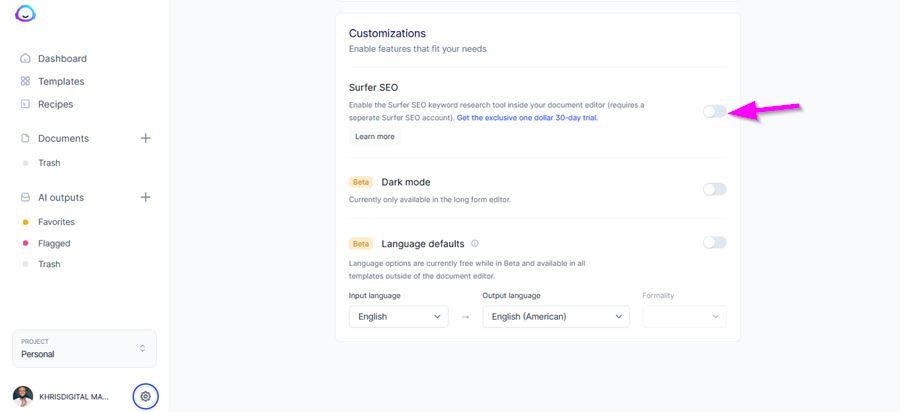
If you don’t have a Surfer SEO account, manual optimization is never out of fashion. I optimize my content manually.
Once an article is ready, I go over the article and find mentions of the main keywords. Address the subheadings and intros to include the primary and some secondary actions.
Use Google Serp to find questions people are asking concerning the topic and use that to build the FAQs section of your blog post (this will not only help you create the best content out there but will help win more Serp positions).
Include your internal and external links where needed.
STEP 10: Check Plagiarism
Since using Jasper there are only a few occasions where plagiarism was mentioned and this was from popular phrases people use.
So I can assure you that you’ll hardly come across plagiarism in the content produced by Jasper.
But at the same time, I recommend that you always perform your plagiarism check for every of content you produce with Jasper.
Besides using Jasper’s plagiarism checker, you can use Grammarly or Copyscape to do checks.
Create Your Blog Post Recipes
Congratulations on writing your first blog post with Jasper, many more to come. There is a high chance you spent over two hours creating your first blog post, let’s build a process and cut the time in half or less.
Introducing Recipes!
Does the word Recipe have you thinking about the kitchen? Well, it is quite similar to what Jasper’s recipes do!
Jasper recipe is a workflow that contains some set of commands to help you with creating a style of content easily and stress-free.
For instance, if you run a blog that covers biographies of celebrities, the next best thing to do on Jasper is to create a workflow for writing biographies (a recipe for writing biographies).
So whenever you want to write a biography, you can open up your recipe and start from there.
I use the Jasper recipe to create workflows for the content with similar repeating patterns.
Some ideas on recipes to create include reviews, listicles, how-to articles, biographies, etc.
Jasper AI FAQs
Here are some of the frequently asked questions according to Google regarding writing a blog post with Jasper. Let’s dive into them.
Is Jasper good for SEO?
Yes, if you have a premium Surfer SEO account to integrate with Jasper. No, if you don’t have one because Jasper on its own is limited when it comes to SEO.
Basic knowledge of SEO will help you optimize your content manually (this is what I do).
Can Jasper write Essays?
This is a yes and a no question. Jasper can assist with writing your essays but you still have to structure the essay based on the guidelines given to you.
However, I do not recommend students use Jasper to write their essays as that is not only against the codes of conduct, it also doesn’t help you as a student.
Rather than looking for shortcuts to write, you are better off learning how to write essays yourself.
Can Jasper Write books?
A BIG yes! Lots of published books have been written with Jasper since the launch of the copywriting software.
There are guides on how to use the software to write books from scratch and once you sign up for an account, the Facebook community is a place to find other book writers and learn from them.
What Can Jasper Write?
Jasper can write nearly every type of content and article. However, when it comes to tutorial guides and technical content, I recommend you write those yourself or outsource them to writers.
How Much Does Jasper Cost?
Jasper offers two pricing plan structures; the starter plan and the boss mode plan. The starter plan costs $29/month and it is best for short copywriting.
The Boss mode plan starts at $59/month and it is best for long-form content. It offers additional features like the Jasper command, documents, SEO mode, plagiarism checker, SEO mode, recipes, etc.
Conclusion: Enjoy Writing Blog Posts with Jasper
Finally, I hope you find this article helpful and have also written your first article at this stage.
If not, then you can get yourself a Jasper account for free and write your first article while going through this article.
Looking forward to reading your first piece created on Jasper.
So what do you think about Jasper (Formerly Jarvis?) Let me know what you think using the comment section.
![NeuronWriter Pricing: [⚠️ Cost and Plans ] 2024](https://b2317160.smushcdn.com/2317160/wp-content/uploads/2024/02/Neuron-Pricing.jpg?lossy=1&strip=1&webp=1)
![KoalaWriter vs NeuronWriter [2024]: Which is the Best Tool?](https://b2317160.smushcdn.com/2317160/wp-content/uploads/2024/04/Neuron-vs-KoalaWriter.jpg?lossy=1&strip=1&webp=1)
![List of BEST Article Generator Software [SEO Optimized]](https://b2317160.smushcdn.com/2317160/wp-content/uploads/2021/09/best-article-generator-software.jpg?lossy=1&strip=1&webp=1)
![List of BEST Shortly AI Alternatives For Copywriting [2024]](https://b2317160.smushcdn.com/2317160/wp-content/uploads/2021/10/shortly-ai-alternatives.jpg?lossy=1&strip=1&webp=1)
![Originality AI Review: [My Real Testing Experience]](https://b2317160.smushcdn.com/2317160/wp-content/uploads/2023/02/Fiverr-Gig-35.jpg?lossy=1&strip=1&webp=1)