
How to Set Up a WooCommerce Dropshipping Store with Spocket
In today’s article, I’ll be writing a step by step guide on how to create a WooCommerce dropshipping store with Spocket.
Dropshipping still remains one of the easiest ways to get started with eCommerce without investing in product upfront.
It saves you from the huge investment of product inventory and shipping logistic whereby all that matters is finding winning products to sell and using a good platform.
Besides the zero inventories when it comes to dropshipping, there is still some major factor causing the success and failure of many entrepreneurs trying out the dropshipping business model.
These days we several dropshipping plugins on WooCommerce that can easily get you confused as to which one to start with.
However, over time I’ve discovered a few of these tools that are actually unique and one of them is Spocket WooCommerce plugin, which is the reason for this article.
How to Create a WooCommerce Dropshipping Store with Spocket
With the Spocket WooCommerce plugin, you can easily set up your dropshipping store and import products from Spocket marketplace and AliExpress to your website.
But before we go on, let’s have a look into Spocket, by understanding what it is and what it works for.
What is Spocket?
Spocket is a dropshipping plugin that allows you to search and connect with suppliers closer to your customer by taking advantage of their huge supplier based around EU and the US.
So, with this, your customer can enjoy 2 – 5 days shipping delivery from suppliers all around the world.
It equally allows you to easily search and import quality and unique products from hundreds of thousands of their products catalogues across various suppliers on the Spocket platform.
With their one-click import button, you can rest assured of having a fully automated dropshipping store with WooCommerce.
Interestingly, you can also order for sample products from different suppliers to evaluate the product yourself before selling them.
Their marketplace is known for high-quality goods with up to 60% discount leaving you with a higher markup on each product.
Which, however, increase your profit margin on each product, cool isn’t it?
Why Use Spocket to Set Up Your Dropshipping Store?
It’s important you know a few of the benefits of using Spocket to start your dropshipping business on WooCommerce.
#1. Product Sourcing
This is one unique advantage of using Spocket compared to other platforms. The ability to source quality and most importantly unique products.
Each and every supplier is completely verified giving all users the assurance of selling quality products and dealing with a reliable supplier.
Unlike AliExpress, whereby, you have to deal with luck because we have both the good and bad sellers.
Although there are few ways to figure out the bad sellers on AliExpress, but Spocket just save you the stress of doing that.
It eliminates the guesswork and gives you the assurance of dealing with the reliable once instead.
#2. Start For Free
You can totally start for free for a stipulated time without submitting your credit card details and gain access to supplier on the platform.
No investment in upfront, you just need to push products and keep your profits.
#3. Branded Invoice
This is what you don’t get with other platforms. Spocket allows your customer to receive their product with your branded invoice written on it. Unlike the generic package used on AliExpress.
#4. Product Delivery
Product delivery on Spocket platform is usually around 1 – 14days which you can’t get on other platforms.
AliExpress allows you to take advantage of the ePacket shipping option to the enabled countries which is still around 20days.
#5. Higher Profit Margins
Not only is their product unique, you also get higher profit margins from selling each product which will overall increase your profit turnover.
How to Create a WooCommerce Dropshipping Store with Spocket
Now, let’s go through how to set up your WooCommerce dropshipping store using Spocket WooCommerce plugin.
- Get a Domain Name & Web Hosting Account
- Launch Your WordPress Site
- Install WooCommerce
- Add and Activate Spocket plugin
- Import products from Spocket Marketplace
- Start Fulfilling Orders on Spocket
Step 1. Get A Domain Name & Web Hosting Account
As you might have known already, first thing first, you’ll need to get yourself a domain name and a hosting account.
Your domain name is the name of your eCommerce website i.e website address. While hosting account is your web house on the internet.
Think of the domain name as the address to the house while the hosting as the actual house. This is where every data pertaining to your site is kept online.
Choosing a domain name is usually easy if you don’t overthink it. It could a niche name related to what you want to sell or a generic name for several products.
Once your domain is chosen, all you need to do is get your domain name and as well as your web hosting account to have your website set up using WordPress.
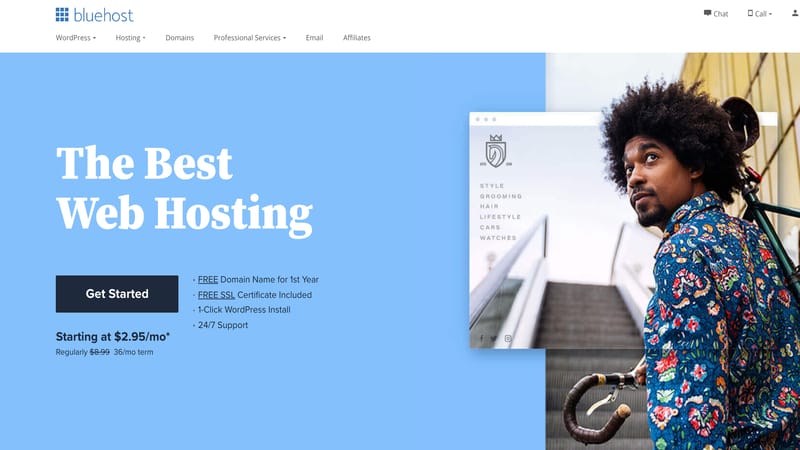
To do this, I’ll recommend Bluehost!
Why Bluehost you may ask?
Well… Bluehost is one of the fastest hosting servers and as well as a large reputable hosting company that has been in business for a very long time.
Bluehost currently host over 2million websites and over 900,000 blogs across the world with a special package with WordPress.org and WooCommerce.
No wonder they are recommended by the WordPress platform themselves.
Bluehost will do save you time and money and equally give you a positive users experience while using their server.
Below are few of the reasons while they stand-out among other companies:
- Free SSL Certificate
- Pre-Installed WordPress and WooCommerce
- Free Domain name
- 30Days Money-Back Guarantee
- 24/7 Customer Support (both phone and live chat)
- Recommended by WordPress
- Established Hosting Company
- 9% Uptime
- And much more!
Now that we’ve seen that, let’s get you a free domain name and a web hosting account on BlueHost.
Getting Your Free Domain & Web Hosting Account
To get started, you’ll need to visit “Bluehost.com” and click on the “get started” button.
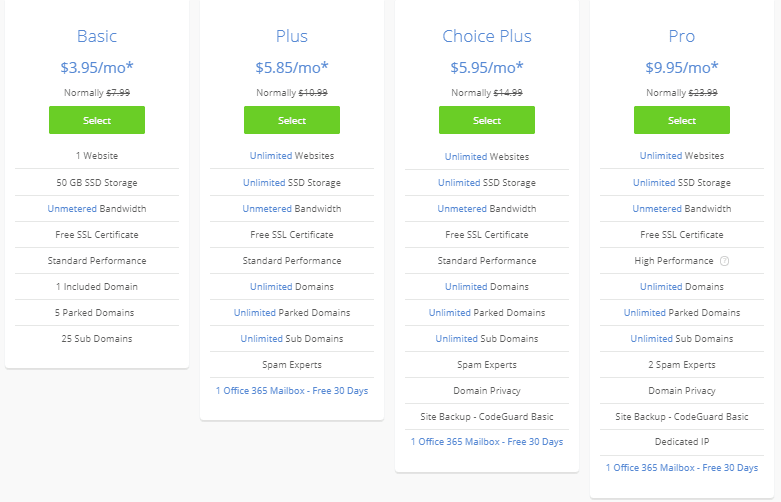
After that, you’ll need to pick a hosting plan.
The basic plan is very much ok and there’s a room for an upgrade in the later future if you see the need for that.
So, go with the basic plan.
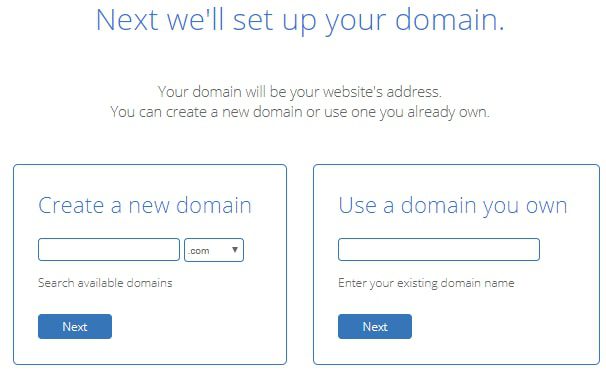
The next page will ask you to choose a domain name for your website. The domain is free with Bluehost. So, you can go ahead and choose your domain name.
However, if you have one already, you’ll need to enter it in the second box at the right-hand-side.
Once you’ve done that, you’ll need to fill out the form with your personal information.
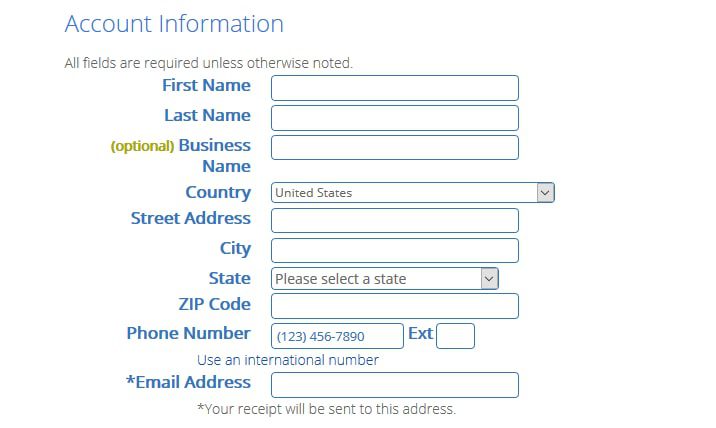
Next, this is the package information.
Here, you can choose your plan base on your budget capacity. The plan ranges from 12, 36 to 60-month straight subscription.
The longer the month the cheaper price you’ll have to pay.
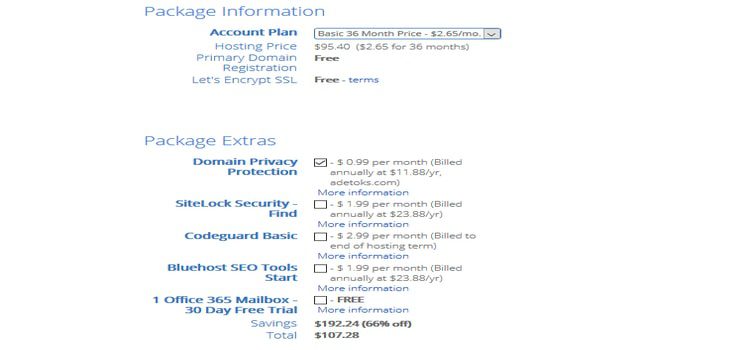
Also, make sure you uncheck the extra ticked boxes to avoid additional unnecessary cost. The only recommended box is the domain name privacy.
Once every of the above is in place, you’ll then need to enter your payment information and tick the “Terms of Service” by Bluehost to proceed.
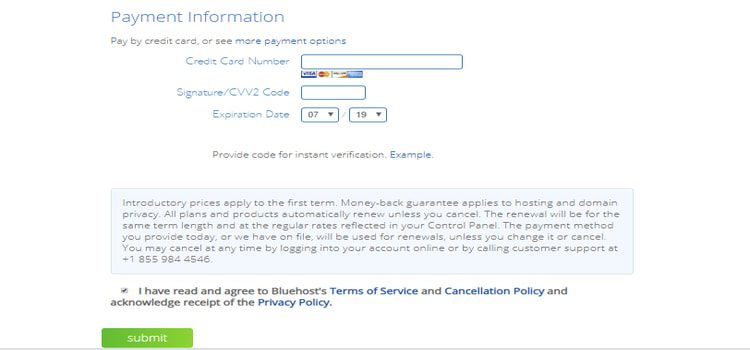
After you’ve must have input the correct payment details simply hit the “Submit” button.
Congrats you’ve just got yourself a domain and a hosting account. The next thing is to launch your WordPress site.
Step 2. Launch WordPress Site
After your successful payment, you’ll receive a welcome email from Bluehost, go ahead and create your password to login into your account.
As I said earlier, WordPress is pre-installed already for you via Bluehost, you just need to login and launch it to become live.
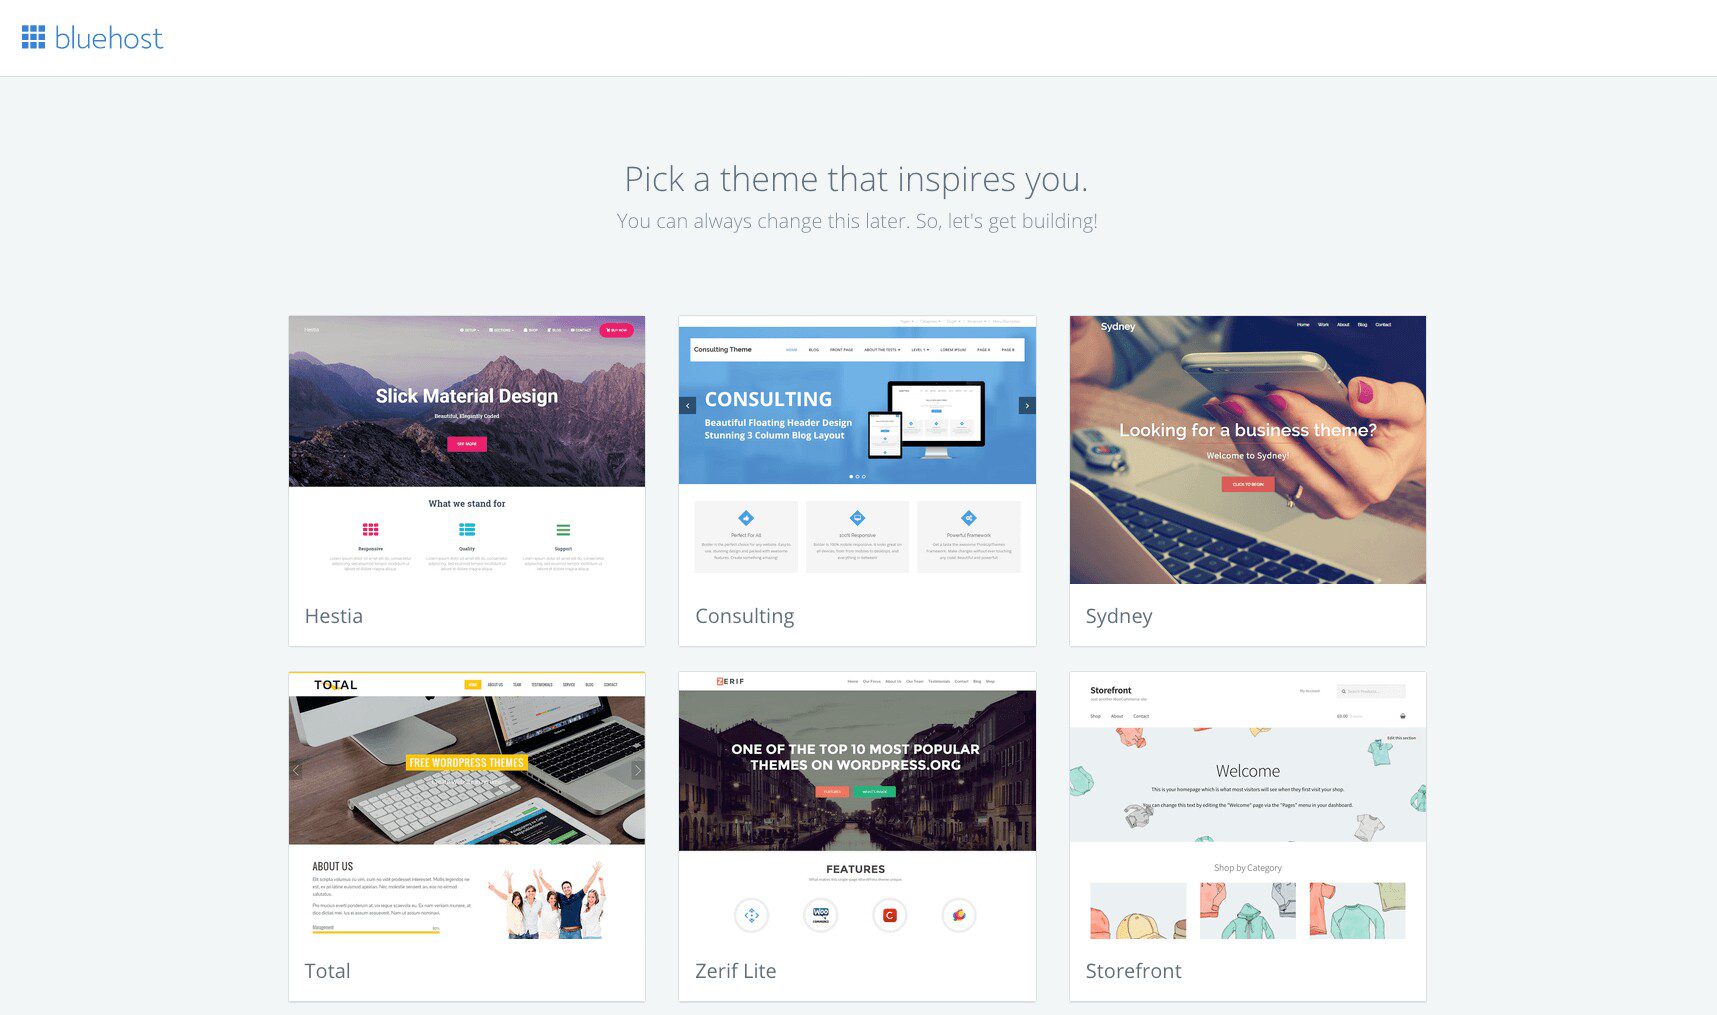
At the next step, you’ll be prompt to pick a theme for your site, simply next it as you can always do so later.
After that, you’ll see a “Start Building” page and immediately you clicked it you’ll be brought to the next page welcoming you to WordPress.
From here, you’ll need to choose what your site will be used for…

After that, give a title and description and BOOM!
Your site is live!
The next thing on the line is to log in to WordPress and Install the WooCommerce plugin in other to create your perfect online dropshipping store with Spocket.
Step 3. Install WooCommerce
It’s the WooCommerce installation that will give your site the eCommerce functionality. Without WooCommerce installed, your site is just an ordinary WordPress site that can’t be used with Spocket plugin.
So now, we need to install and activate WooCommerce and after that install and activate the Spocket plugin as well.
From your Bluehost account, you can easily log in to your WordPress account. And once you’re in there you’ll need to click on a plugin at the lower left-hand side of your WordPress admin dashboard.
- Go to Plugins then ==>> Add New
- Enter “WooCommerce” on the Search bar
- Select the “Install Now” button
- Finally, click the “Activate” button and follow the On-Screen WooCommerce Wizard Set-Up

Once it comes up, hit the install button and activate it as well. Upon activation, the WooCommerce will pop up the on-screen Wizard set-up.
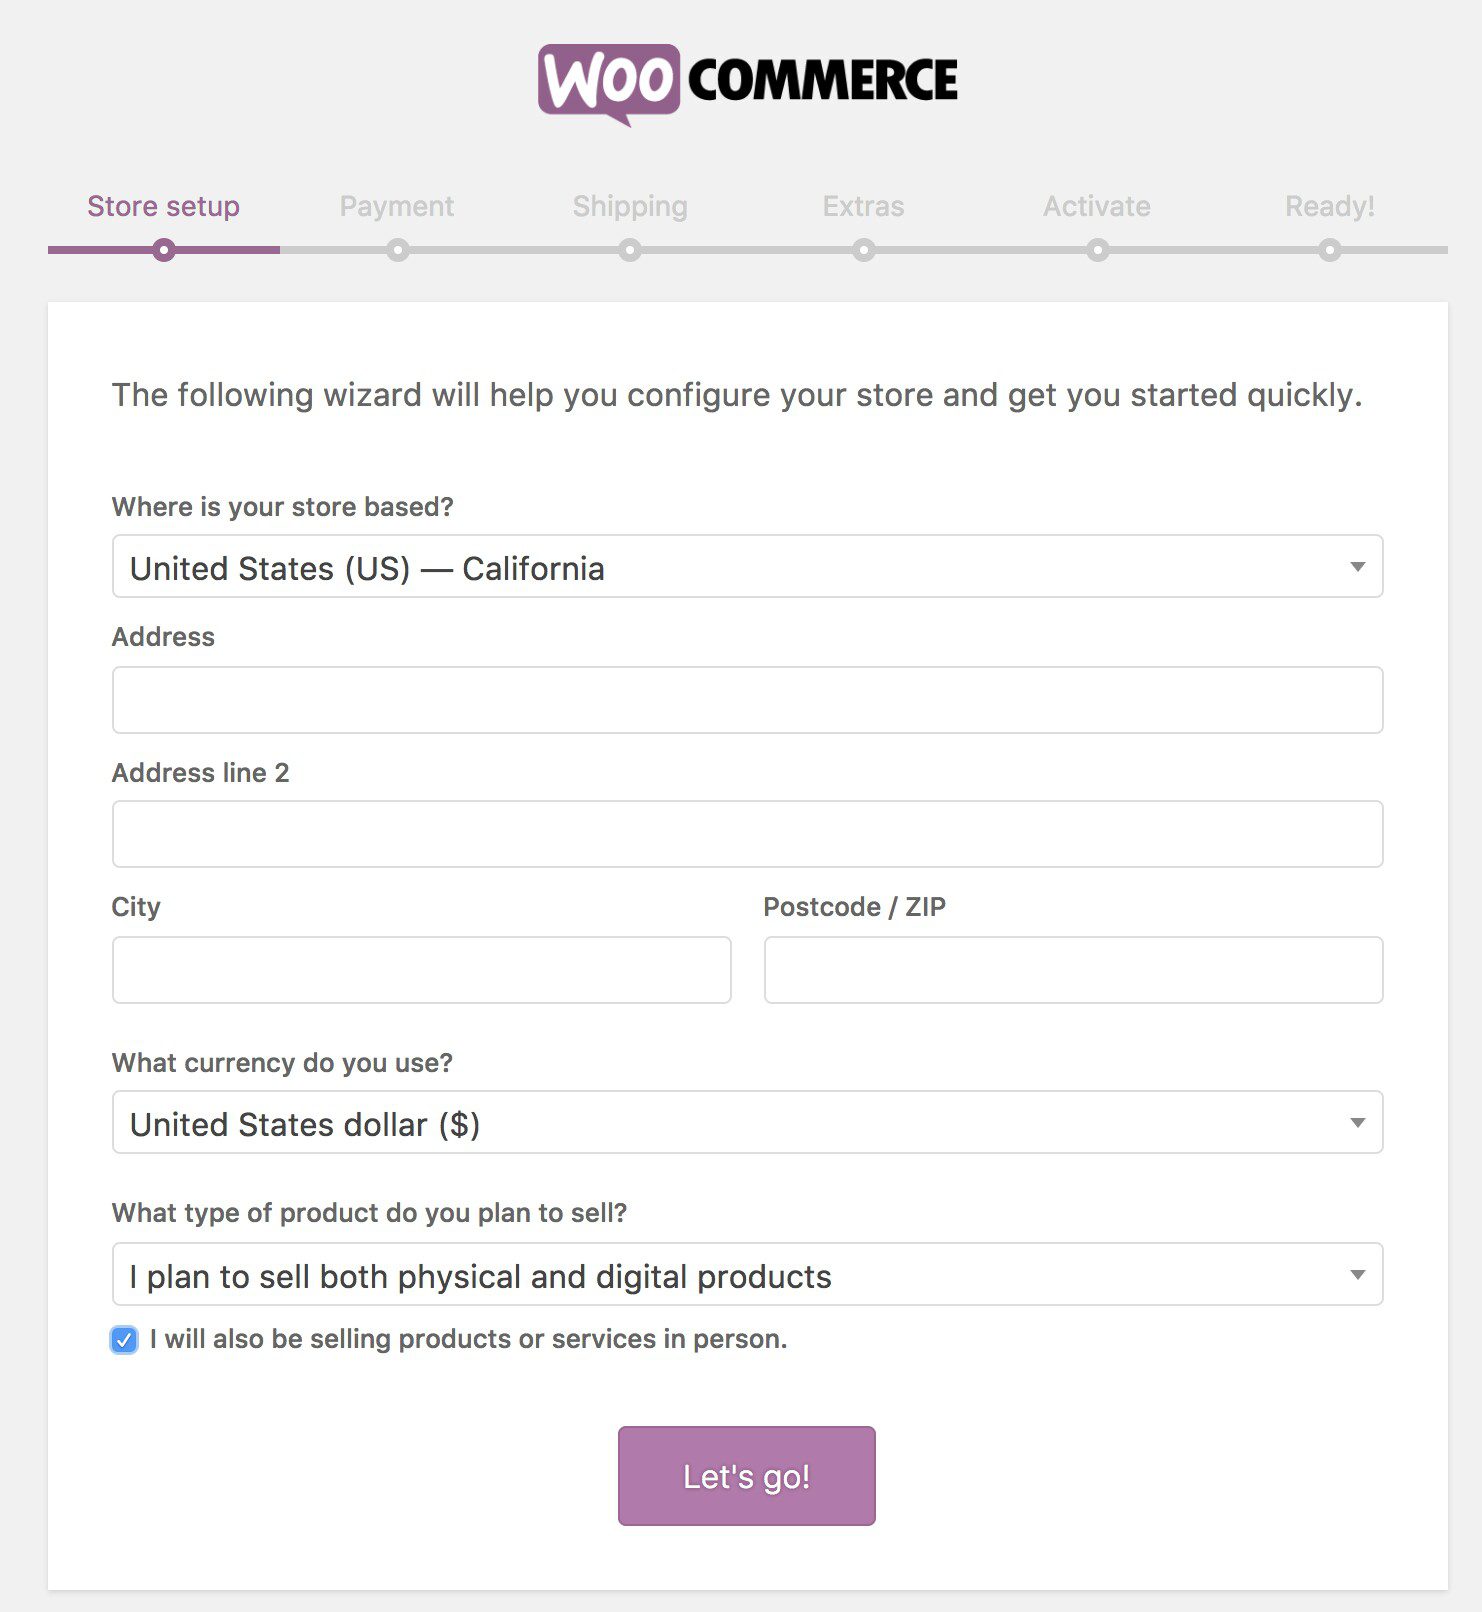
Just follow through; it’s only going to a few seconds.
After that, you need to customize your WooCommerce store by installing a theme and other necessary plugins to optimize your site.
Plugin like:
- Yoast SEO (SEO)
- Updraft (Site Back-Up)
- Smush Image (Image Optimization)
- Insert Header Footer (Inserting Codes like Pixel etc)
For the theme, I’ve listed over 20 WooCommerce themes optimized for dropshipping that are both free and premium themes.
Or simply get started with WooCommerce STOREFRONT it’s equally a free theme to use with WooCommerce.
Great!
The next thing to do now is to install the Spocket WooCommerce Plugin and start adding products to your online dropshipping store.
Get Started with BlueHostStep 4. Install Spocket Plugin
For this, you need to head over to Spocket.co in case you don’t have an account already. If you do great and if you don’t, you just need to do that now…
It’s only going to take a few seconds! (Spocket Sign-Up)
After that, log in to your WordPress admin dashboard and click on “Plugin” ==>> “Add New” then search for Spocket.
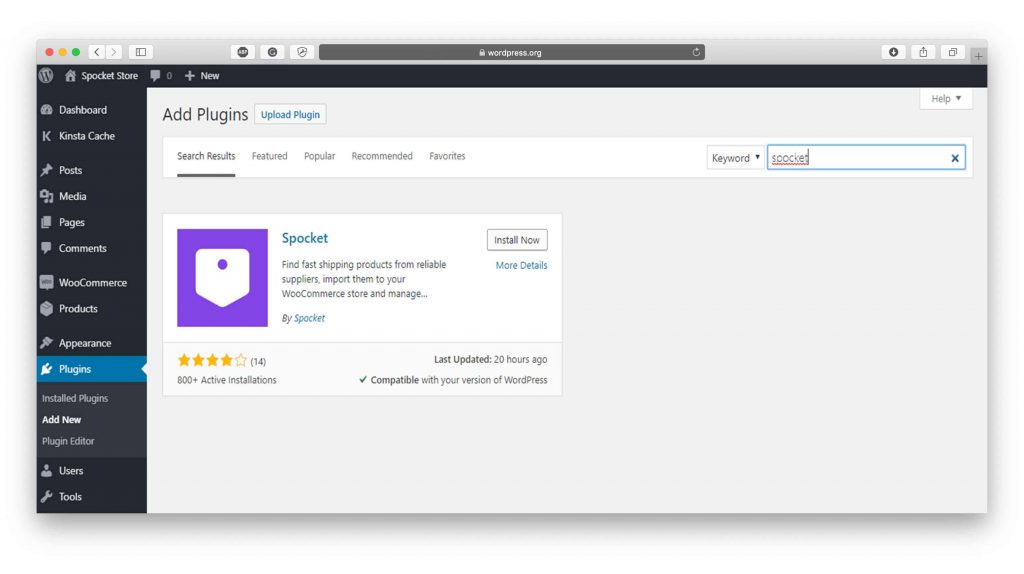
Once it comes up, what you need to do is install and activate the plugin. Next, it’s going to ask you to connect to WooCommerce, hit the “Approve” button to have it connected.
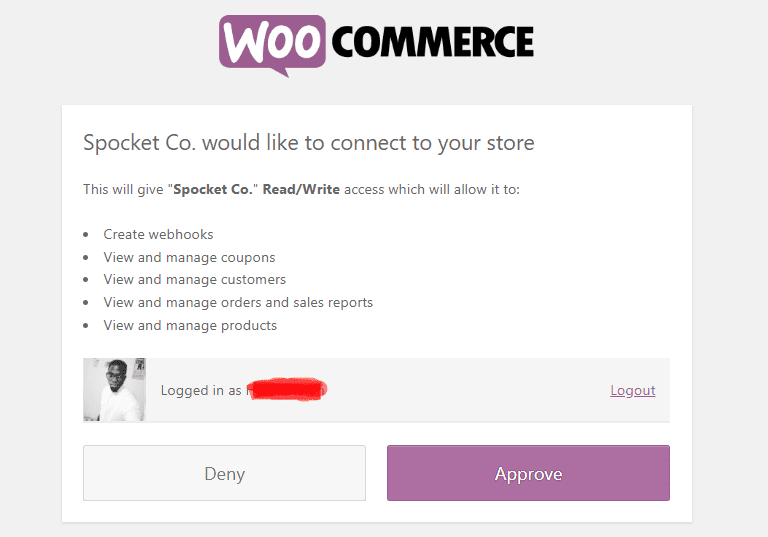
After that, the next page will prompt you to “Go to Spocket”. Once you clicked on the link you’ll be redirected to your Spocket dashboard where you can start importing products to your WooCommerce store.
Step 5. Import Products on Spocket Marketplace
All account created on Spocket by default is a free plan. But for you to start importing products and fulfil orders, you need to choose a plan.
However, the good thing is, all of the three plans come with a 14Days free trial to test out the platform. These plans include:
- Starter Plan $9/month
- Pro $49/month
- Empire $99/month
Once you’ve chosen your plan, the next thing is to start adding products to your online store. You can learn more about the best pricing plan here.
In other to start filling your Store with products, Spocket made it easy by the virtue of their various filter such as:
- Keyword Search
- Product Category
- Price Filter
- Select by Location
- Supplier
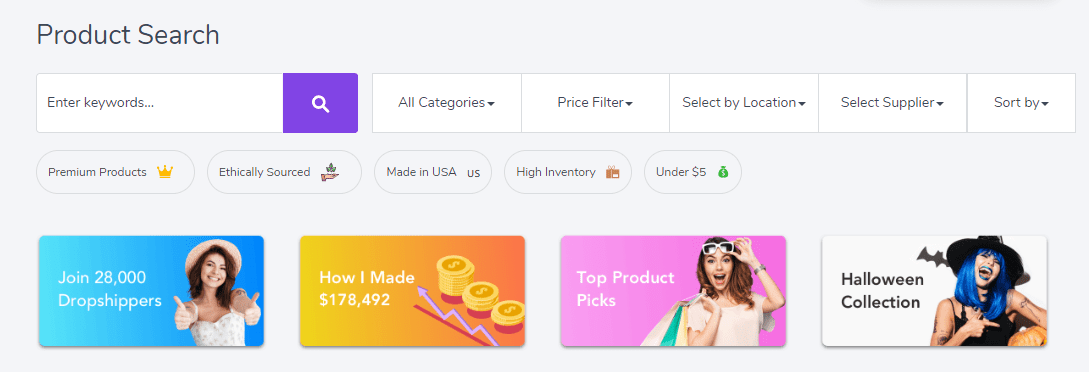
Basically what this filter does is that it makes the entire product search easier. Let’s say, for example, you want to search by “Location”.
This feature allows you to choose products based on your supplier location. With this, you can easily have your products sourced within your customer location and have it delivered to them as fast as possible.
Before you finally import you product, if you want to know more about the product, you can just click on the product and it’ll bring out everything pertaining to the product.

Data like:
- Listing price
- Retail price
- Shipped from country
- Product variant
- Shipping cost
- Product images
Once you’re satisfied, you can then click on the “Add to import list”.
Step 6. Fulfilling Orders on Spocket
Let’s say by now you’ve started promoting your store and you’re receiving order already that need to be fulfilled.
This is quite easy as most of the process is automated already. So, basically you’ll receive an email notification for every order placed by your customers.
Once you’ve received this, head over to your Spocket dashboard and click on the “Order” tab. Every order received on your webstore will be listed here.
There is an option to view customer’s info if you want and if you don’t you can just proceed to clicking the “Checkout” button.
After clicking on the “Checkout” button the taxes and shipping cost for each customer will be generated automatically.
Finally, click the “Place Order” button to have it sent to the supplier. At the same time, the product cost and shipping fee will be deducted from your account linked with Spocket.
The rest is for the supplier to handle. Immediately your supplier ships the products both you and your customer will receive a notification as per the whereabouts of the product.
Conclusion
That’s basically how to create a WooCommerce dropshipping store with Spocket.
Here’s the summary of what needs to be done.
- Create an account with Spocket.co
- After that, get your free domain and web hosting with Bluehost
- Launch your WordPress site
- Install WooCommerce
- Add the Spocket plugin and activate it
- Connect Spocket with your WooCommerce plugin
- Import products to your store
- And Start Fulfilling orders
Not so difficult is it?
That’s pretty much everything about how to create a WooCommerce dropshipping store with Spocket. However, if you would prefer a standalone WordPress dropshipping website you can also do that.
Let me hear your thought on this using the comment box.
Try Spocket For Free
![How To Get FAST Shipping on AliExpress [Best Way]](https://b2317160.smushcdn.com/2317160/wp-content/uploads/2017/11/ePacket-delivery-2.png?lossy=1&strip=1&webp=1)


Interesting master piece. When I grow up, I will like to be like you! That was on a lighter note.
Can an already existing woocommerce store be integrated with spoket plugin? Or you must start with a new store?
Lol…
Yea, you can integrate an existing WooCommerce store with Spocket.
can both spocket plugin and alidropship woo plugin be used on one store
You can install both, but you’ll have to deactivate one for another